Kerry Dunn Studio
Tuesday, July 1, 2014
Thursday, March 7, 2013
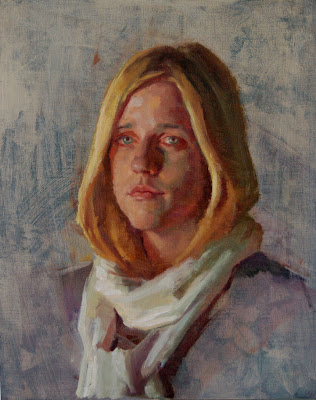
self portrait sketches 6x9
self portrait
6x9
oil on board
2013
self portrait
6x9
oil on canvas
2010
Sunday, March 3, 2013
Self Portrait
Toto and I
30x40
oil on canvas
I worked on this painting for the better part of three months, logged in about 260 hours. Probably my most ambitious portrait to date. Feeling pretty good about it. Hope folks like it.
Tuesday, October 16, 2012
Portrait sketch of Jessica
16x20
oil on board
oil on board
This is a portrait sketch I did of Jessica. Jessica sat for me for about 5 hours in my small natural light studio in Philadelphia. Of course I then had to sit for her the next day, only fair right?! I was able to photograph the painting at our breaks throughout the day which is below. The tone I painted on was an old painting I had wiped out and ended up making a neat background. I feel really good about this one and she made such a great model and was so patient and diligent. Thanks Jess!
Wednesday, August 15, 2012
Sunday, August 12, 2012
'Particle Accelerator' a still life painting
Nest on wood
12x12
oil on birch panel
(courtesy of American Easel)
http://americaneasel.com/
1st day - blocking in overall composition and developing concept.
The nest was found by my housemate a while back. I borrowed it from her studio since she was away on vacation. Thanks Jafung!
The nest was found by my housemate a while back. I borrowed it from her studio since she was away on vacation. Thanks Jafung!
2nd day - reblocking nest as focal point and begin finishing pass.
End of 2nd day - nest completed.
This painting took three days total to complete.
The area surrounding the nest was painted on the third day. It was sitting on my model stand, which is dark stained wood with paint and tape randomly stuck to it.
Thanks for visiting!
Saturday, June 2, 2012
2 Small rose paintings alla prima
8x10
Both of these two little paintings were done in one day. About 6 hours each. I have discovered that bringing them indoors makes rendering the roses convincingly much easier. Because I have north light coming in from one direction I can discern how the light is falling across the form of the petals. It was much more difficult painting them outside on overcast days where the light was coming from all over the place. However, in the future I plan to tackle roses in outside in overcast lighting again, now that I have built more confidence in my abilities to paint roses, even though indoors...
Stages of a rose painting
photo of the set up
8x10 cotton canvas panel, toned neutral grey with acrylic paint
Began to scrub an oil tone over the painting...
Oil tone or 'imprematura'. The main reason I chose to do this for this painting is that it creates a wet bed of paint to work into, very nice for the 'wet on wet' method. I discovered (as I have seen in the works of others) that this color also will be seen in the final painting, either seen as an undercolor through the final layer or small spots of color in unfinished areas. This can be very pleasing, especially if it compliments the overall dominant color of the subject.
Begin blocking in larger shapes of color, trying to feel out a good composition.
Color block in - At this point my design is set. Now I can begin working smaller areas as they relate back to the whole.
finished painting
Below is a close up view of the rose's stages of development.
Subscribe to:
Posts (Atom)


